Discord TTS Command [Text-to-Speech]

Discord, as we all know quite well, is a Voice over Internet Protocol, group messaging, video calling, and communication platform that brings people closer from the world over! Its overall appeal lies in the fact that it is accessible to all, can be customized, can have different channels and private servers, and more!
The way Discord works is simple. You create a server once you have the Discord client app added to your device. Then, you can customize this server by adding your friends via invites. You can also create channels for specific topics such as gaming, music, arts, literature, and more!
Today, we are set to discuss the Discord TTS command. If you’re unfamiliar with this feature, we recommend that you give this article a good read!
Check Customize Discord Server?
What is the Discord TTS command?
The Discord TTS or text to speech command is a method of converting written text to speech for your fellow Discord mates. It can not only be used for fun but has some functional aspects as well. Today’s article is all about this feature and how you can access it on your Discord server.
Even if you aren’t necessarily on Discord, in cases where you need to send audio but don’t have a mic, text to speech can aid you in quite a few ways. The Discord Text to Speech bot is a program that will connect and work on any device including PCs, laptops, and smartphones!
You can easily get the bot to read out text-based documents or even PFDS! That makes it quite a versatile option! Bots can be used for serious applications such as for any user who has visual impairments and requires the content to be in a speech format. However, in most cases, the Discord TTS command is a great way to have some fun!
The Discord text to speech feature is accessible to all Discord users! However, the only thing you need to make sure of is that you go to your settings and enable this feature before you begin. The cool thing is that as long as it is allowed, you can simply add a slash before your message and it will be converted to TTS.
It applies to both sides; in case your TTS command is not enabled, you can’t send any audio speech and if your user’s TTS is disabled, they won’t be able to hear your messages! So, it is vital to make sure the command is enabled.
Check Discord echo cancellation
How to enable the Discord TTS command?
As we mentioned before, this is accessible to all users regardless of their devices. That’s why, for today, we will be walking you through step by step so you know how to enable TTS for Discord. However, the process is slightly different for Mac OS and Windows users, so both will be outlined below for your ease!
Here is how you can utilize Discord text to speech for Windows OS:
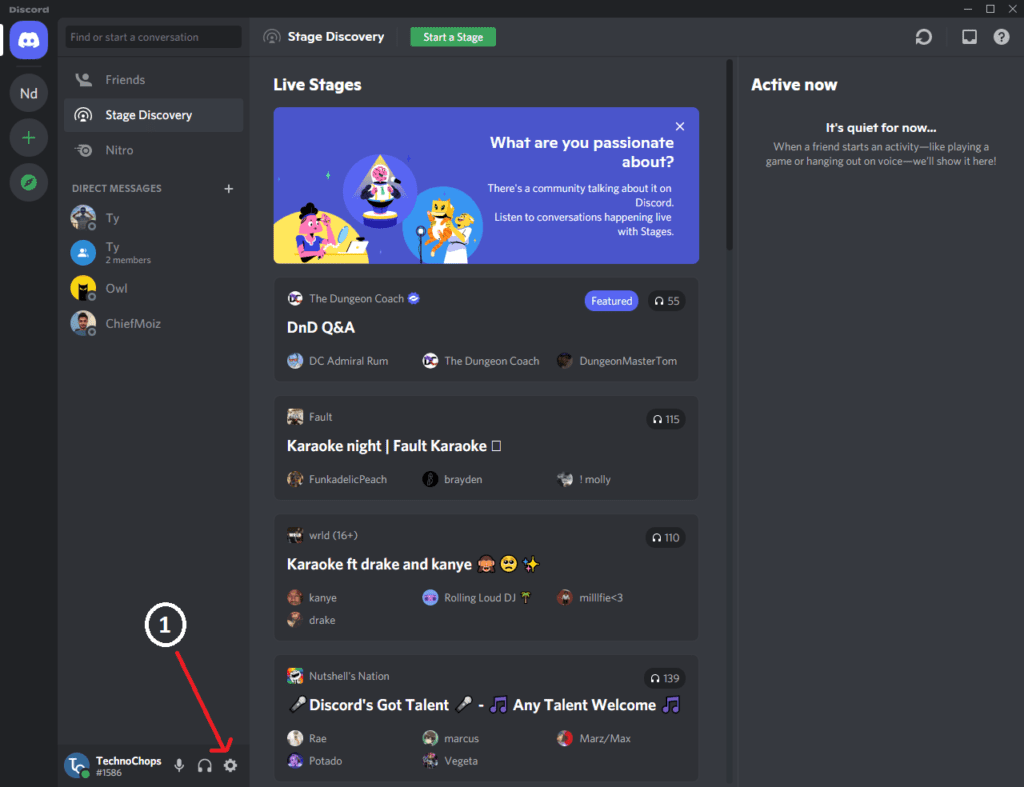
1. Your first step will be to launch your Discord app and go to the settings. Here, you will see the settings icon and you can click on it.
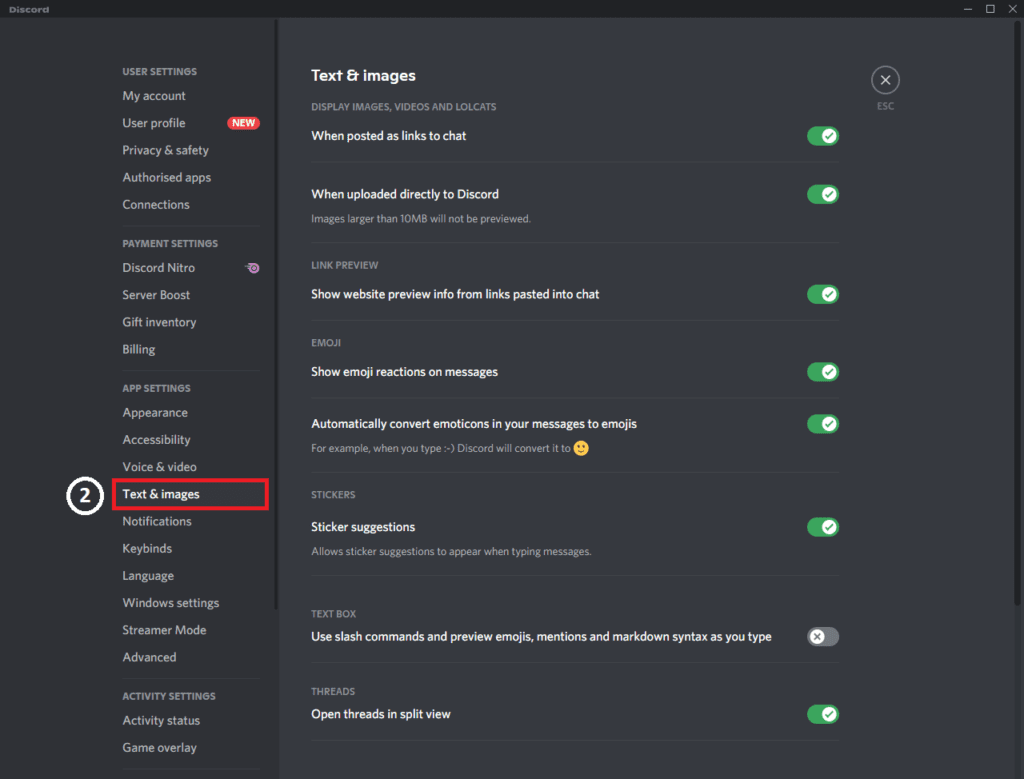
2. Next, once you are at the settings, search for “Text and images” option and click on it.
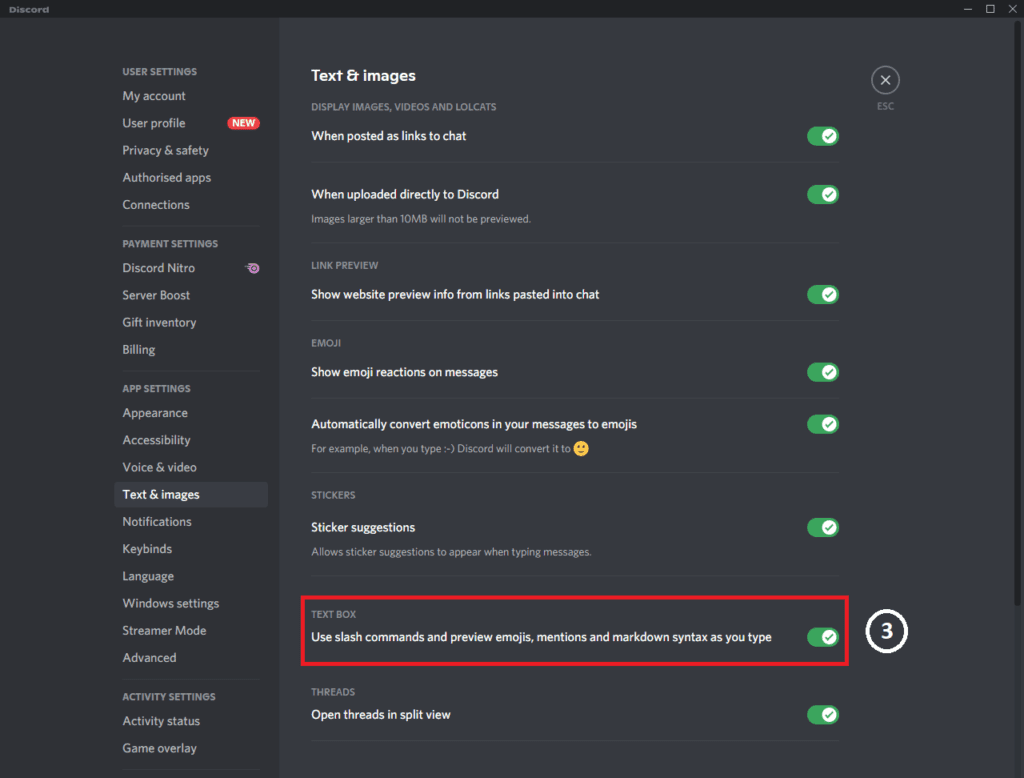
3. Here, you will find “Text Box” option, just enable and it will allow you to use slash commands in the text box.
4. Now, go to any server and type “/tts” and Discord will automatically detect it as a command and will ask you to enter your message.

5. When you send that message, the other users will simply see it like a normal message but they can hear it by clicking on it or by going to more options and clicking on “Speak message“.
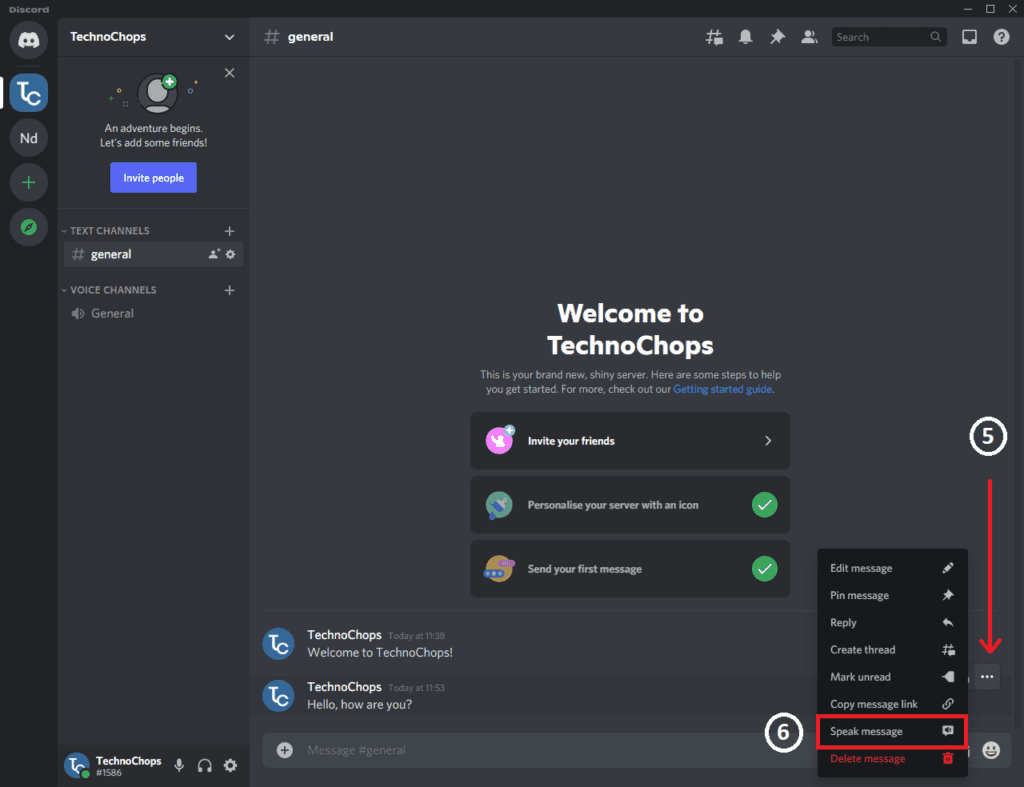
We would recommend this as an extra but important last step!
Check Stream Switch on Discord
TTS command notifications
If you do not enable notifications for TTs command, you might miss out on it if you are away. The notification is what will alert you to the message in the first place. Open the app settings and then look for the notifications button. Click on this and scroll down till you get to the TTS command notifications. After this, just turn them on and you’re good to go!
The important part comes here when you have to choose between 3 different scenarios or options!
- For all channels
When you choose to enable this text to speech feature for all channels, it means that no matter the number of channels, every user will be able to hear your messages regardless of which channel they’re on. So, it essentially applies to your entire server. This is a popular setting that people with visual impairments will opt for.
- Never
As the name suggests, this is pretty much disabling the TTS command on discord for all servers and channels. Text will never be translated into speech that can be heard aloud. It will not activate even if you type the //tts command.
- For only the current channel in use:
In our opinion, this option is the perfect middle ground to opt for. You might be more interested in the happenings of one specific channel and that means you want to be aware of everything! That’s why for this option, you can easily allow text to speech to go through. Only the users in that specific channel will be able to hear any messages.
This last option is also beneficial if you wish to step away from the Discord server and engage in some other activity. It will allow your users to send a voice message easily which you can hear even if you aren’t reading the messages.
The option that you choose to select will depend on what your requirements are as a user so it will be different for everyone!
Check Discord TTS Troll
Now that you know precisely how to access the TTS command for Windows, let’s look at how to enable this for Mac users as well!
While it is not that different, there are 2 unique ways you can use the Text to speech feature for Mac. So, let me walk you through the steps!
- Your first step will be to launch the Discord app on your Mac device.
- After this, you will scroll down the screen and search for the icon for settings. It will be in the shape of a gear.
- You will click on the option that reads Notifications.
- Go down the options and search up the option for Text to Speech Notifications.
- Here is when you decide whether you are turning it on for all channels or just the one that is currently being used. This is a crucial aspect as it will set what channels will hear your audio messages.
- In case you do not want to utilize this option, you can also set it to Never from here. This will not enable this feature to be used.
This has been the first method that you can opt for to turn on the discord TTs command for Mac. However, there is another way you can work this as well.
Here are the steps to accomplish that:
- First, you will choose the option for Text & Images.
- Then you will go to the option that reads, Allow playback & usage of the /tts command. Make sure to turn the toggle switch on for this!
- Once you turn this on, you will be able to easily but for this method, you will have to type a slash followed by tts command at the beginning of your message or text. Add a space after this command as well and then type whatever you wish.
- One thing to keep in mind is that in case your user’s TTS command is not enabled on their servers, then they will not hear the audio! They will see the text alone.
- For example, once Discord is open, you can go to your channel to send something.
- Then, write: /tts at the beginning of the message, write Hello after space, and press enter.
- The slash and tts will not appear, all your users will see and hear is your message! It will also address your username along with the message. And that’s it!
Conclusion
If you’ve ever had your hands full and you wanted to easily access Discord functions, now you can with this handy guide on everything about the Discord TTS command! It is super simple to access and as long as you follow the steps we’ve listed above; it shouldn’t be too hard for you to utilize!